
how-to-install-a-tile-backsplash
Steps for Installing a Tile Backsplash
How to Install a Tile Backsplash requires patience and precision. We recommend professional Backsplash Installation services to ensure your kitchen walls remain protected from moisture and look exceptionally neat.
Before applying any adhesive, clean the surface thoroughly to remove grease and dust. A smooth substrate allows the mortar to bond securely, preventing loose tiles and uneven grout lines down the road.
Always dry-fit your tiles on a flat surface before sticking them to the wall. This lets you plan cuts around outlets and corners without wasting valuable materials during the project.
Preparing the Work Area
Clear countertops completely and tape off surrounding cabinets and appliances to protect them from adhesive drips.
Gather all necessary tools including a notched trowel, tile cutter, spacer clips, bucket, sponge, and high-quality mortar.
Wear safety glasses whenever you cut ceramic or glass tiles to protect your eyes.
Mix the thin-set mortar according to the manufacturer instructions until it reaches a smooth consistency.
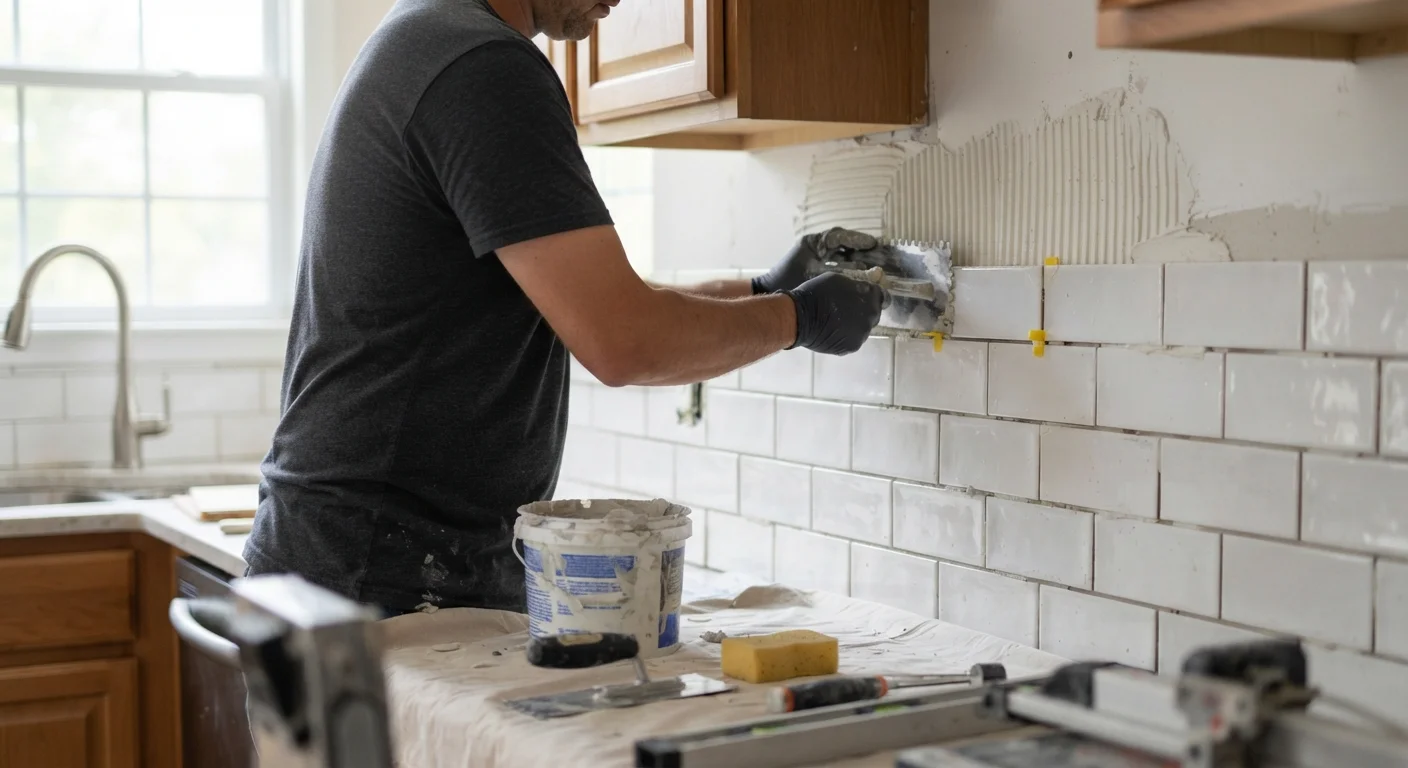
Spread a thin layer of mortar onto a small section of the wall using the notched side of your trowel.
Press each tile firmly into the mortar bed with a slight twisting motion to secure it.
Insert plastic spacers between individual tiles to maintain uniform grout lines across the entire pattern.
Grouting and Sealing
Allow the mortar to cure for at least twenty-four hours before removing spacers and applying grout. Use a rubber float to press grout into the joints diagonally.
Wipe away excess grout haze with a damp sponge after it begins to set, then apply a sealant to protect against stains.
The team transformed our kitchen with incredible attention to detail and professional craftsmanship.
Learning how to install a tile backsplash can completely transform the look of your kitchen while protecting your walls from everyday splashes. Many homeowners choose professional Backsplash Installation to ensure clean grout lines and a durable finish.
Gathering your tools and materials
Before you begin your project, collect all necessary supplies, including tiles, tile cutter, thin-set mortar, notched trowel, spacers, grout, and a clean sponge.
View tile designsLearning How to Install a Tile Backsplash can completely transform the look of your kitchen and add lasting value to your home. Proper planning is essential before you begin cutting materials or mixing mortar for your project.
When you are ready to start your Backsplash Installation, make sure you have all the necessary tools and safety gear gathered in your workspace. Taking your time with each measurement will ensure a clean and professional finish that you can enjoy for years.
Learning How to Install a Tile Backsplash can completely transform the look of your kitchen space. Proper Backsplash Installation protects your walls from moisture while adding a stylish design element to your home.
Start by thoroughly cleaning the wall surface and measuring the area to determine your exact tile requirements. Applying high-quality adhesive evenly ensures your tiles stay firmly in place for many years.
Learning How to Install a Tile Backsplash can completely transform the look and feel of your kitchen space. Proper Backsplash Installation requires patience, precision, and the right tools to ensure a durable and beautiful finish that stands the test of time.